EN
EN
 English
 Français
 Deutsch
 Italiano
 Español
 Português
 Nederlands
 Polski
 Türkçe

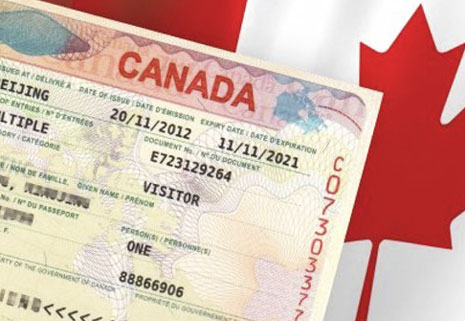
Canada Visa Photo Requirements and Size
Canada is the country of outstanding natural beauty, delicious maple syrup, award-winning hockey teams, and a dream destination for many tourists. If you’ve decided to cross its border, you may need to get a temporary resident visa from one of the Canadian diplomatic missions before you pack your suitcase. To save you trouble down the road, we’ve listed all the Canadian visa photo requirements below. Read this article and you’ll learn specific demands, such as the format, focus, background, lighting, etc. you should take into account to obtain the right photo for your application.
It's a matter of seconds with passport & visa photo maker:
Canadian Visa Photo Specifications
Whether you’re planning to use the services of a local photo studio or decide to prepare a proper picture yourself, you should closely follow these visa photo specs to avoid rejection.
- Provide two identical photos of yourself with your application.
- Both photographs must be taken within the last six months.
- They may be either black and white or color.
- The photographs must be clear and well-defined.
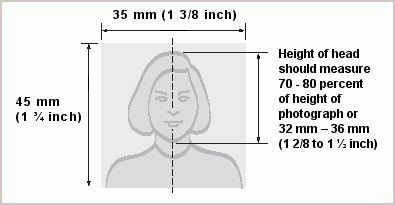
- Canada visa photo size must be at least 35 mm x 45 mm (1 3/8 inches x 1 3/4 inches).
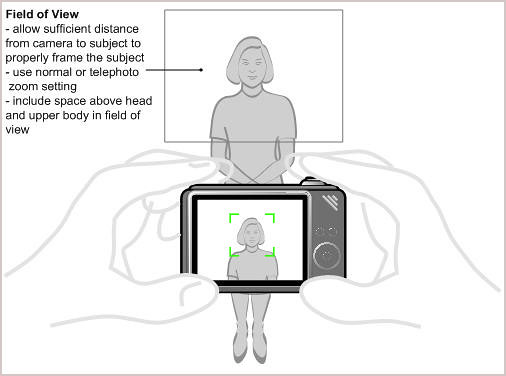
- Photographs must show the full front view of the head, with the face in the middle of the photograph, and include the top of the shoulders.
- Your head should be centered and measure between 31 mm (1 1/4 inches) and 36 mm (7/16 inches) and centered.
- Photographs must be printed on quality photographic paper. Glossy preferred.
- Dimensions of your visa digital photo are 420 x 540 pixels minimum.
Canadian Visa Photo Guidelines
The specifications above will give you an idea of what to look forward to when getting your visa photo done, however, there is much more to the process. Be sure to check out each guideline as a rejected photo means a delay in vacations.
- Take your visa photo in a bright room with natural lighting. Stand one meter away from the wall, otherwise there may be a shadow on the wall.
- Choose a solid background (plain white or light colored). No designs or scenery can be showing.
- Your face must be square to the camera with a neutral expression, neither frowning nor smiling, with your eyes wide open and mouth closed.
- Make sure the tops of your shoulders are square with the photo frame and not twisted or slumped.
- Your skin tone in the photo must be natural and not distorted with a flash.
- Hair can be either up or down. A hairpiece or other cosmetic accessory is acceptable if it does not disguise your normal appearance.
- There’s no specific dress code but it’s better to wear something casual.
- Any head covering worn for religious reasons must not obscure your facial features.
- You may wear non-tinted prescription glasses as long as the frame does not cover any part of your eyes. Sunglasses are not acceptable.
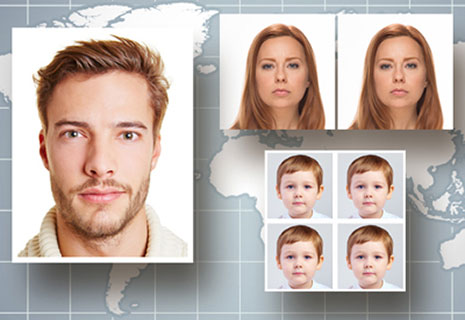
Requirements for Babies Photos
If you plan to travel with your children, each of them will need an individual photo for Canada visa. Luckily for you, the Canadian government recognizes the difficulty of taking the right picture of an infant or toddler so the rules are not so strict. To make your child’s photo as compliant as possible, follow these tips:
- Your child can be lying or be positioned in a seat.
- The background should be solid and white. Use a sheet for best results.
- The photo should not show anything other than the background or the child.
- If a parent is holding the infant, their hands must not be visible in the picture.
- Try getting the infant’s face square and with mouth closed.
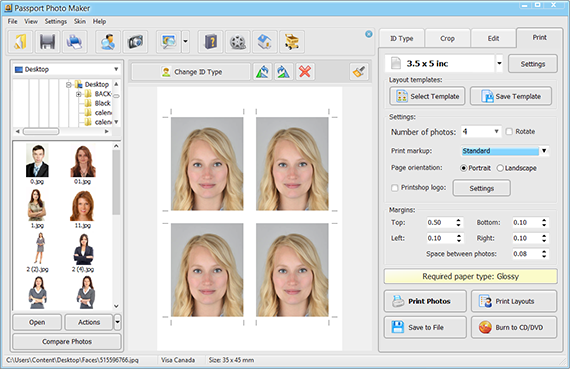
How to Make Canadian Visa Photo with Our Tool
Your working schedule makes it hard to order a photo from a professional? Take the application process under your full control and prepare a picture in accordance with Canada’s regulations using a Canada visa photo editor. We recommend that you use Passport Photo Maker that will do all the work for you just in a few minutes.
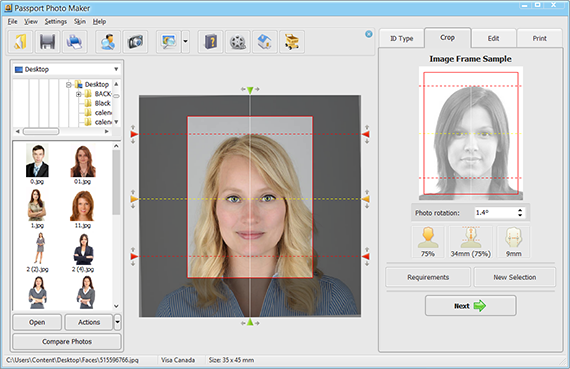
- Step 1.Add the photo of your family member or yourself to the program. Browse through the built-in collection of ID types and find a suitable visa template. The software is equipped with auto face detection that instantly crops your picture in a proper way so you won’t have to set the necessary Canadian visa photo size with your own hands.
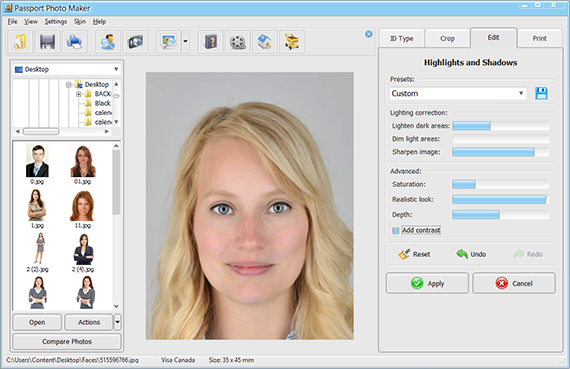
- Step 2.While on the Edit tab, fix lighting and quality issues - adjust the shadows and highlights, enhance the overall contrast and sharpen the image. Numerous retouching tools available in the visa photo editor will let you remove the red eye effect and get rid of skin blemishes. The photo editing toolkit also enables you to change background and even your clothes with a few mouse clicks.
- Step 3.Thanks to the smart printing module, you can use custom settings and print on any paper size. Change the paper orientation and adjust margins to fit as many photos on the page as you need. If you plan to submit your visa application online, save your edited image in a digital format. The program will ask you to pick a suitable format. Later you can easily convert your file to JPG or PNG etc depending on the format the Canadian embassy will accept.
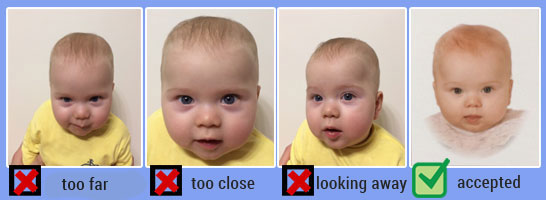
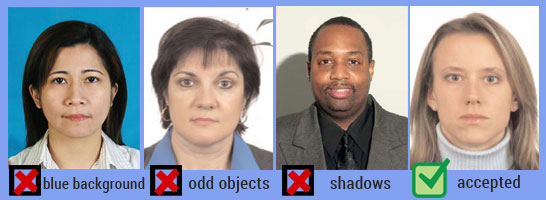
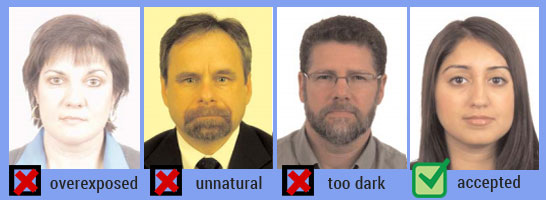
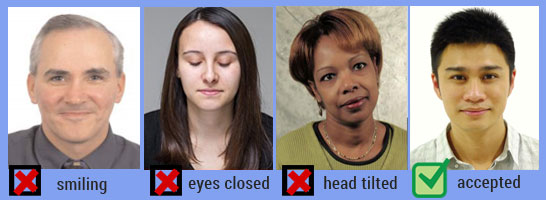
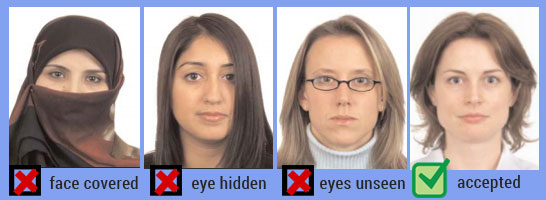
Examples of Approved and Rejected Photos
So you’ve made it that far through the guide, it’s time to see some Canadian visa photo examples. Here we’ll show you the most common ‘dos and dont’s’. Take a closer look at the picture samples for Canadian visa below to understand the difference between approved and rejected photos.
So now you have all the necessary information on how to prepare the right visa photo. We hope that with our step-by-step guide and examples of right and wrong visa pictures you will make the perfect photo for your application!