 EN
EN
 English
 Français
 Deutsch
 Italiano
 Español
 Português
 Nederlands
 Polski
 Türkçe
 Tiếng Việt
 العربية

Tethered Shooting - Step by Step Guide
Imagine that you’ve just returned from a photo shoot with dozens of cool images. You connect your camera to a computer, start looking at the photos and... They’re not cool anymore. Some are too dark, some are too blurry and only few are decent. Horrible? Yes, and I bet almost every beginner has been in that awkward situation. How to not get caught in it again? Here’s the answer for you: tethered shooting.
Why does that situation even happen? Well, a tiny screen on your camera doesn’t show all the details. You will most likely not notice the issues with lighting, shadows, bad color balance and others. And when you open these photos on a large monitor, you get absolutely different results due to the resolution difference between the screens.
So, the solution is obvious. Now, how to tether your camera to a computer? I admit, it may seem tricky at first. But just keep reading and you’ll learn all the necessary things to start right away.
What Is Tethered Shooting?
It’s the process when you shoot remotely with your camera connected to a computer, tablet or smartphone. Usually, people use USB cables for the connection, but the latest camera models can be tethered via Wi-Fi.
Once the camera is connected, all the images you capture will be sent directly to the computer. You can view them on a large monitor, do some editing and save to a desired location.
Normally, it’s used for convenience, to see the images instantly without connecting an SD card to a computer. However, people often use tethering for self-portraits too, when there is no one around to assist.
Pros and Cons of Tethered Shooting
Let’s start with the pluses. First of all, you will be able to see the image more clearly. When it’s displayed on a large monitor, you can notice the flaws and fix them on the go. And instead of restarting the photoshoot once again later, you can make all the adjustments and continue the process. This is very useful when you have a very short session or session with a crowd, which happens often in school photography.
It will take a picture only a few seconds to appear, so both you and your client can quickly preview the photos, right on the spot. Here lies another advantage: when you shoot tethered, people around you can see the result clearly too and come up with different ideas you can use later in session. Teamwork!
All that leads to a better image quality. Now what about the downsides? For starters, it devours the battery of your camera and laptop. So you will most likely be chained to a power socket. Or will have to take extra batteries for your devices, especially if you shoot on location.
Next, it may be costly. Yes, right now this way of shooting has got cheaper, but still requires you to spend money. Even if you are not a professional, you will still have to buy various cables, tripods, bags and so on. Don’t forget about a decent laptop, tethering application and camera.
However, I still think getting a better image quality is worth all the effort and money. If your thoughts are the same, then let’s get started.
What You Need to Get Started
Camera
Almost all modern DSLR cameras support tethering, but the devil is in the details.
For instance, some cameras can save images to both laptop and memory card, which is very convenient for further editing. Others allow a photographer to use Live View, that is to transfer the view from the camera lenses to your monitor. If you want to keep the working space neat, choose the device that lets you tether via Wi-Fi or Ethernet instead of a USB cable.
So look carefully though the guides, think about the features you’ll need and check if your tether program supports that camera model.
Laptop
Tethering camera to a laptop instead of a PC is a wise choice if you often shoot on locations or travel a lot.
Start with checking the connectivity: the device should support USB 2.0 or 3.0. The high connection speed will make your workflow easier. It will do no good if you have to wait for a whole minute until your photo shows up on the display.
The next important thing to think about is the monitor. For tethered photography, it should be large and have proper color balance. This will let you spot the flaws like bad lighting or lack of focus from the first sight and make the correct adjustments. Don’t forget about the glare as well. If the image can be hardly visible in the sunlight, buy or make a special hood for the monitor.
Tether Table & Cable
If you like shooting outdoors, you will need special photography equipment like tether table and cables.
The first one is a bracket that allows you to attach your laptop to a tripod or lightstand. Then you can place it wherever you need, at any height. If you’re looking for utility, then some tables even have special holds for cables, HDDs or SD card readers, which is very convenient.
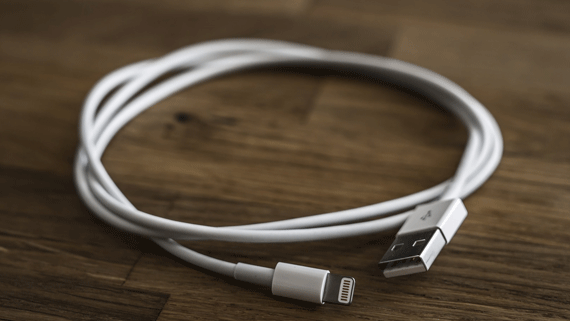
The default cable that comes with the camera may be too short for controlling camera from a computer, so you may have to think about purchasing custom cables. They can be of different length, just pick the one suitable for your setup. I suggest choosing long and bright cables - that definitely helps not to step over something while looking for a good shot.
Special Software
Not all image editors support tethering, so you will need special software . Which one to choose? Currently, there are several options.
First one is Adobe Lightroom. It’s one of the most popular programs and not for nothing. Many editing features, convenient management, tons of custom presets and a large fan base. Although it may be a top-rated image editor, Lightroom has a couple of disadvantages if you select it for hooking up your camera. For instance, some of its features use a lot of performance, and you will need a high-end laptop for running Lightroom at its full power.
The second program is Capture One. It is made especially for remote shooting, so there are many features that speed up this process. However, if you prefer user-friendly interfaces and easy workflow, where you don’t have to dive into hundreds of unnecessary features, it’s better to try something else.
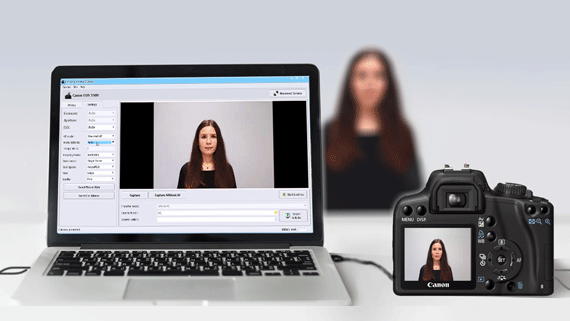
Which brings us to the third option. If you use a Canon camera, then canon tethering software is what you need. I suggest taking a look at Canon Camera Control.
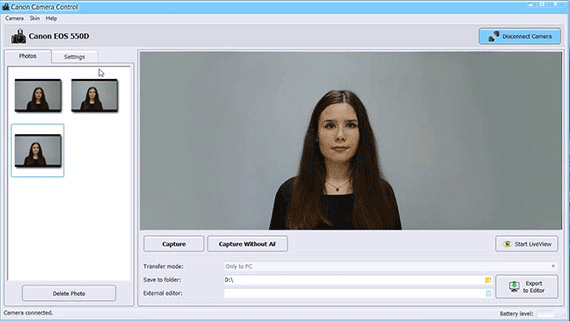
It supports the majority of Canon EOS cameras, and to my opinion, it is the golden middle between Capture One and Lightroom. If you’re an advanced photographer, you will definitely like the ability to make live shooting on your camera.
What’s also really cool, you’re able to transfer the shot to any image editor for further editing. Not to mention other pluses like separate saving (PC or SD card), post-processing features and auto focus control.
It comes as no surprise that tethering software is a must-have for photo studios. It helps you serve more customers, automates the process and makes shooting easier. So your operators won’t have to run back to the camera every time to check the photo they’ve just taken or to adjust some camera setting.
Conclusion
Now you should have some basic knowledge about how to shoot tethered. No matter what equipment kit you’ll gather and what software you’ll use, it will save the hours you’d spend on fixing images later. It may look cumbersome at first, but tethering will help you achieve better results for sure.
Learn More
