Need to Take a Biometric Passport Photo?
How to Make a Biometric Passport Photo: the Ultimate Guide
Today biometric or electronic passports are an essential part of safe and efficient travel. This type of official documents acts like a fingerprint and allows more reliable verification of the holder’s identity. They are embedded with radio frequency identification microchips and a biometric photo, meaning such passports can hold information about the owner’s physical characteristics. For example, the distance between the eyes, nose, ears and mouth, as well as other personal data, such as their name, date of birth, passport expiration date, etc.
Having such a sophisticated passport at hand, you can secure yourself from identity theft and streamline airport queues. However, this document requires a specific biometric passport photo that meets all the requirements of official agencies. What is a biometric photo, you might ask. Keep reading and you’ll find out what makes this kind of image different from other ID pictures and how to prepare it yourself.
Passport Photo Biometric Specifications
Below, we’ve listed key requirements for passport photos with biometric specifications, so that you won’t have to browse through other websites.
- Your biometric photo for passport must be taken within the last month prior to applying.
- The photo must be 2x2 inches in size, with the head covering between 1 inch and 1 3/8 inches of the overall height (in case of US passport).
- The photo resolution must be no less than 300 dpi (better 600 dpi).
- Two identical photos should be printed on quality glossy or matte paper with no border.
These are the main requirements, however, there are many additional ones. So, if you want to make a biometric photo, then you need to comply with all the specs, such as:
Appropriate Lighting & Contrast
Your face must be in focus. The picture should have good contrast and reflect your natural skin tone. Avoid having a strong light that casts deep shadows on your facial features: they should be clearly visible. Do not use a flash since it might give you red eyes, create glare or reflections on glasses.

Suitable Background Color
The background for a biometric picture must be plain. It’s better to pick white or light gray color. Keep in mind that the background shouldn’t blend with your hair or clothes. Also, there shouldn’t be anything else in the frame except you: no patterns, shadows on the wall or any other odd objects around.

Facial Expression & Pose
You need to keep a neutral face expression. Avoid smiling or frowning. Look directly at the camera, do not tilt or turn your head away. Your mouth must be closed. Your eyes should be fully open and clearly visible. Do not cover your ears and forehead with hair or headwear.

Headwear, Headsets & Glasses
Generally, glasses or wireless hearing sets are prohibited. You can wear them only if you have a written prescription from your doctor. In this case, put on glasses with thin frames and avoid getting any glares. As for the headwear, it is allowed for religious reasons only.

All these requirements are not easy to comply with but it doesn’t mean your photo must be government-issued. You can take an ID picture yourself and prepare it at home using a biometric passport photo maker. Want to give it a try? Let’s get things under way.
How to Make Biometric Photo with Passport Photo Maker
Today there’s a wide choice of programs and online services to generate ID pictures. We’d recommend you get started with Passport Photo Maker. This biometric photo creator is convenient and offers pro-level tools that you won’t find in other software for home use. Below you’ll find a step-by-step guide on how to work with the program.
Step 1. Add Your Picture to Passport Photo Maker
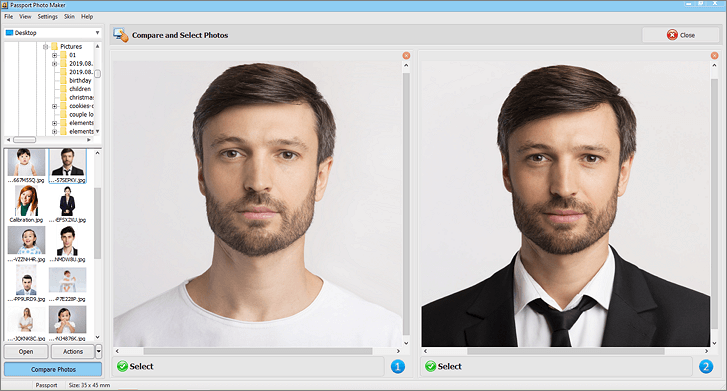
Click the Open Photo icon to add the picture you’ve already taken to Passport Photo Maker. If you have several photos and can’t choose the best, click Compare Photos and simply drag up to six of them from your Windows Explorer to the working area. The program will present them side by side, and you’ll clearly see which one looks better. You can also take a photo of yourself using a default camera in your computer. Click File > Webcam Capture. In a new window, connect your camera to the program and take a shot you’ll then edit.
Step 2. Pick a Suitable ID Photo Template
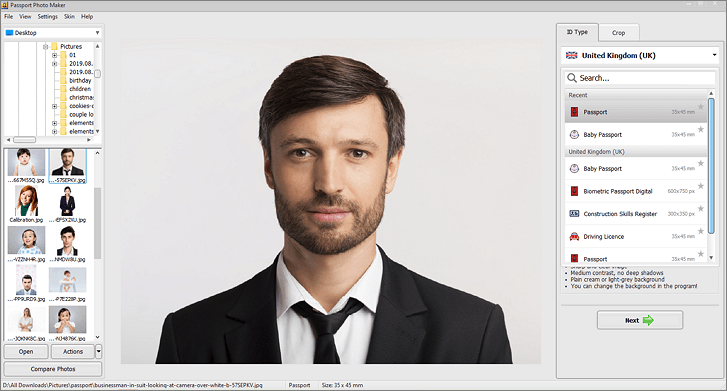
While on the ID Type tab, choose a suitable passport photo template. Use the Search field to find the country you need, then select the desired document type from the drop-down list. The database offers different presets for 130+ countries, so you can make a photo for UK visa or German passport photo with ease.
Step 3. Crop the Photo to Passport Size
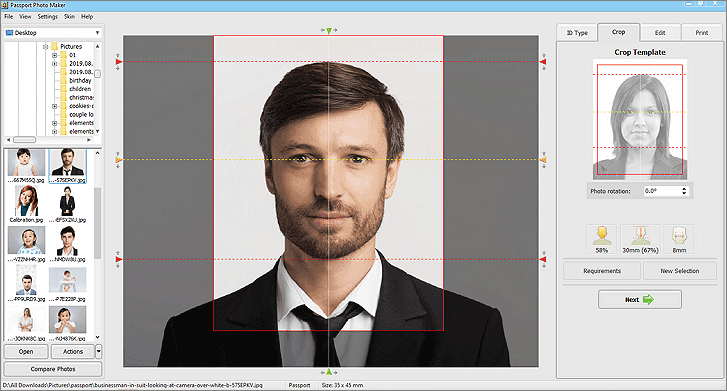
Switch to the Crop tab. Thanks to smart face detection technology, the program will automatically recognize the biometric features of your face and crop the picture for you according to the requirements. That way you don't have to worry about the right size of your head or eye distance in the photo.
Step 4. Make Your Passport Photo 100% Perfect
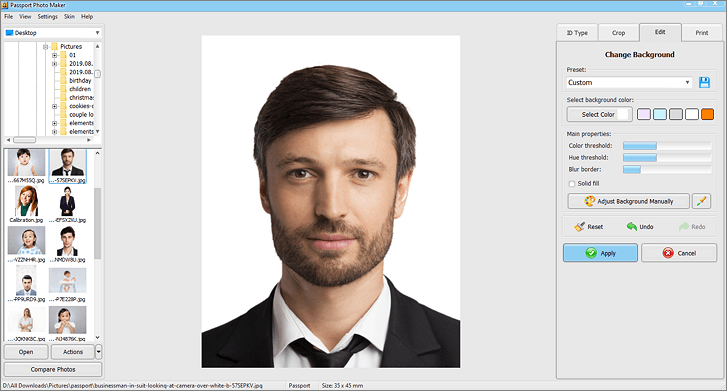
Move to the Edit tab to adjust brightness and contrast, replace everyday clothes with more formal attire or change the background color. The program lets you improve the color balance, change highlights and shadows without exporting your picture to some other editor. However, while working with your passport photo, try preserving its natural look. Otherwise, your application might be rejected for too many changes in post-production.
Step 5. Print Your Biometric Passport Photo
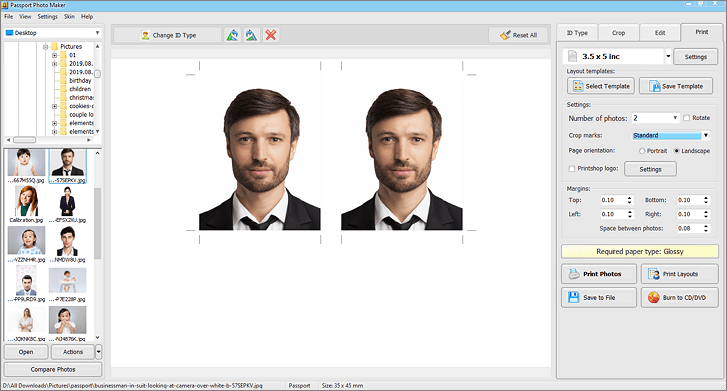
When your passport photo is ready, switch to the Print tab. Choose the paper size and select the number of photos you need. Set the margins and add crop marks to leave enough space between the pictures and make it easier to cut the copies out. Once you’re satisfied, click the Print icon and get your biometric passport photos.
Passport Photo Maker isn’t just biometric passport photo software, it will help you prepare decent ID pictures for all kinds of documents - visa, driving licence, student’s card, Green Card, DV Lottery and many others. Of course, you can find a photo booth and have your picture taken by a professional photographer, or you can pay once for this ID image maker and make as many official photos as you need in the future!

 EN
EN
 English
 Français
 Deutsch
 Italiano
 Español
 Português
 Nederlands
 Polski
 Türkçe

